Tuesday, May 13, 2008

Florida Pie: TWD

In the words of the hubby:

"This is like... the best key lime pie I've ever had in my entire life."

I don't think I could top a review like that.

Simply said, this is a divine little pie. I'd never tried making a key lime pie, but was excited for this week's challenge. Since my store doesn't carry fresh key limes, I opted for the jarred stuff, but you could hardly taste a difference.

The color threw the husband a little off - we're used to more of a bright green thats probably produced with some nice artificial coloring. But without the color added, we could pretend it was healthier... right?

This is a definite keeper, though next time I might leave out the coconut in the meringue. While it was tasty, it added a little too much chewiness to the texture for my liking.

Florida Pie

1 9-inch graham cracker crust (page 235), fully baked and cooled, or a store-bought crust
1 1/3 cups heavy cream
1 1/2 cups shredded sweetened coconut
4 large eggs, seperated
1 14-ounce can sweetened condensed milk
1/2 cup fresh Key (or regular) lime juice (from about 5 regular limes)
1/4 cup of sugar

Getting Ready:

Center a rack in the oven and preheat the oven to 350 degrees F. Put the pie plate on a baking sheet lined with parchment of a silicone mat.

Put the cream and 1 cup of the coconut in a small saucepan and bring it to a boil over medium-low heat, stirring almost constantly. Continue to cook and stir until the cream is reduced by half and the mixture is slightly thickened. Scrape the coconut cream into a bowl and set it aside while you prepare the lime filling.

Working with a stand mixer, preferably fitted with a paddle attachment, or with a hand mixer in a large bowl beat the egg yolks at high speed until thick and pale. Reduce the mixer speed to low and beat in the condensed milk. Still on low, add half of the lime juice. When it is incorporated, add the reaming juice, again mixing until it is blended. Spread the coconut cream in the bottom of the graham cracker crust, and pour over the lime filling.

Bake the pie for 12 minutes. Transfer the pie to a cooling rack and cool for 15 minutes, then freeze the pie for at least 1 hour.

To Finish the Pie with Meringue:

Put the 4 egg whites and the sugar in a medium heavy-bottomed saucepan and heat over medium-low heat, whisking all the while, until the whites are hot to the touch. Transfer the whites to a stand mixer, fitted with the whisk attachment, or use a hand mixer in a large bowl, and beat the whites at high speed until they reach room temperature and hold firm peaks. Using a rubber spatula, fold the remaining 1/2 cup coconut into the meringue.

Spread the meringue over the top of the pie, and run the pie under the broiler until the top of the meringue is golden brown. (Or, if you've got a blowtorch, you can use it to brown the meringue.) Return the pie to the freezer for another 30 minutes or for up to 3 hours before serving.

Saturday, May 10, 2008

Italian Baked Lamb Chops

Italian Grandmother's are great. I happen to have one, and they seem to have a long running tradition of being pretty handy in the kitchen. That, and making sure you eat, because to them, everyone looks like they are starving.

I don't have too many memories of cooking with my grandmother, since we lived about 2,000 miles away most of my childhood. But I do know she made a killer homemade gnocchi. And in return, I subjected her to my version of peach pie when I was 12 years old- A can of peaches, the juice cooked & thickened with corn starch, dumped into a store-bought crust, and baked. But she was very supportive of my endeavors.

Another great thing about Italian Grandmothers, they don't pay too much attention to pesky things like whether you are related to them or not. So while I did not get too much time in the kitchen with my own grandmother, I knew a few through various family friends and church events.

At one such church event, I met a little Italian grandmother that made this heavenly dish of baked lamb chops. Delicate, juicy, and layered with more onions, tomatoes, and garlic than you gan shake a fist at. And she was nice enough to take pity on my 14 year old culinary self, and wrote down the recipe for me.

15 years later, I have this recipe committed to memory, and it is my 'go to' recipe anytime I want to wow someone. Or if I want to spoil my dad when he's out to visit. Or pretty much any time I feel like I need a little grandmotherly love.

Cast of Characters:
This is pretty straightforward in the ingredient department. Other than the chops, everything else can be found in most any kitchen - sliced onion, chopped garlic, sliced tomatoes, grated Romano (or parmigiana, both work well) cheese, olive oil, salt (table works as well as sea), pepper, and Italian seasoning (or your own mix of dried basil/oregano/etc).

For the chops themselves, I've learned to try not to be too picky. Most grocery stores carry lamb chops in a limited selection, and I'll grab whatever looks good. These petite loin chops would be my first choice since they are lower in fat and gristle, and the thickness lends a nice juiciness to the dish. If loin chops aren't available, I'd recommend some shoulder round chops or rib chops. I wouldn't recommend the shoulder chops because they are pretty riddled in bone and gristle, and pretty hard to cut up and eat when layered under all the tomato-ey goodness.

Assembly:
So... to assemble this, we do it in three repetitive layers, plus a layer of chops. Depending on the size of your chop, I usually allot for 2-3 per person. So we want to pick a baking dish large enough to fit them all. Snug fitting is fine, they will shrink a bit as they bake. First we start by drizzling the pan with about 1/4 cup of olive oil. Lamb can be a fatty meat, so less is more with the oil. I usually use my pampered chef pump spritzer for this.

Next, layer in 1/3 of the tomatoes. A nice even layer, allotting for at least one slice under each chop, or just evenly spread about.

Next, we add 1/3 of the sliced onions, and 1/3 the chopped garlic. The more the better as they definitely add a punch of flavor to the dish.

Finally, we add a liberal dash of the Romano cheese, salt, pepper and Italian seasoning.

On top of this, lay the chops.

Repeat the oil - through - seasoning layers.

Repeat them one last time. The more the better here, the less you can see of the chop, the better.

Now, take this multi layer wonder and put it in the oven at 350 deg f for 40 minutes. Set about making some risotto, and try not to gain 20 lbs simply smelling the chops as they meld with all the flavor.

After 40 minutes, we're not quite done. Take out the chops, and turn the oven up to 375 deg f. Now we want to drizzle the chops with some white wine. The Nice Italian grandmother wrote 1/4 a cup, but honestly, I just drizzle straight out of the bottle, whatever you have in the house. This week I happen to have cooking wine. We're more of a red wine drinking household, so I usually keep white cooking wine on hand. But whatever white you have on hand is fine. Heck, I've used Saki in a pinch, and it still tasted great.

After a healthy drizzle pop the chops back in the oven for 15 minutes.

NOW they are ready.
Serve with a spatula to get up as many of the 'extras' with each chop. The baking has made them all meld into a melt in your mouth nirvana of flavor.

Enjoy. And try not to eat the whole pan on your own. Maybe invite your own italian grandmother over, and make her proud.

Italian Baked Lamb Chops


Ingredients
4 Lamb Chops
3 Tbs Olive Oil
3-4 Cloves Garlic, Chopped
1 md Onion, sliced
2 Tomatoes, sliced
3 Tsp Italian Seasoning Blend
3 Tsp Salt
3 Tsp fresh Ground Pepper
1/2 c Grated Romano Cheese
1/4 c White Wine

Directions

  1. Preheat Oven to 350 deg F
  2. This recipe is done in three layers of ingredients, construct in the following order: Drizzle a glass baking dish with 1 Tbs Olive Oil, 1/3 of the Chopped Garlic, 1/3 of the Sliced Onion, 1/3 of the Sliced Tomatoes, 1/3 of the Italian Seasoning, Salt, Pepper, and Romano Cheese.
  3. Lay the chops flat on this first layer of ingredients, then repeat the Oil, Garlic, Onion, Tomatoes, Seasonings and Cheese twice for a total of three layers altogether.
  4. Bake at 350 deg for 40 minutes, then drizzle with 1/4 cup White Wine. Increase heat to 375 deg, and cook an additional 15 minutes.
  5. Serve with a spatula to get as many of the extra ingredients with the chop as possible, and enjoy.

Tuesday, May 6, 2008

Peanut Butter Torte : TWD

This weeks challenge of a peanut butter torte, as soon as I saw the picture, was another dessert that immediately begged the question "Where can I bring this" so that I didn't end up with a giant calorie ridden sweet in the house tempting us.

A friend of mine is getting married in a couple weeks, and we were plotting her bachelorette party for Saturday evening, so I figured it the perfect opportunity to rid my house of this temptation.

Reading through the directions, the only step that worried me was the cool time since I knew I'd need to be out the door by 4:30ish to get to the party, and Saturday/Sunday are my big baking days. I'd hoped to get the ingredients Friday night to get an early start on Saturday, but you know what they say about 'best laid plans'...

Anyhow, I was able to put this together pretty quickly, with the help of a few time saving ideas (I did feel sorry for the make a wish people when pounding their contest note with my tenderizer for a speed 'chop'...). I was left with closer to 3 hours of cool time instead of 4, so I 'helped' things along by starting it in the freezer for about 45 minutes, then into the fridge to get a more regulated temperature.

It came out nice and chilled, and made its way to the party where there were many 'ooohs' over it. I had decided to add the leftover oreos to the top as a decoration as to cut down on the leftovers in the house, and I think it added a whimsical charm. I think Nabisco could make some good money if they produced peanut butter covered oreos.

I gave the bride to be a chance to slice into the cake, nice practice for the big day. Though if she gets that same maniacal look whilst holding the knife, If I were her new husband, I'd make a run for it (just kidding!).

The cake served up pretty easy on some nice beachy plates for munching as we moved into the next party game - a rousing version of dirty pictionary. My musically inclined husband, by the way, was quite proud when I relayed getting a quick win for "g spot" by drawing a bar of sheet music with a treble clef and a note on "G".


Peanut Butter Torte

1 ¼ c. finely chopped salted peanuts (for the filling, crunch and topping)
2 teaspoons sugar
½ teaspoon instant espresso powder (or finely ground instant coffee)
¼ teaspoon ground cinnamon
Pinch of freshly grated nutmeg
½ c. mini chocolate chips (or finely chopped semi sweet chocolate)
24 Oreo cookies, finely crumbed or ground in a food processor or blender
½ stick (4 tablespoons) unsalted butter, melted and cooled
Small pinch of salt
2 ½ c. heavy cream
1 ¼ c confectioners’ sugar, sifted
12 ounces cream cheese, at room temperature
1 ½ c salted peanut butter – crunchy or smooth (not natural; I use Skippy)
2 tablespoons whole milk
4 ounces bittersweet chocolate finely chopped

Getting ready: center a rack in the oven and preheat the oven to 350°F. Butter a 9-inch Springform pan and place it on a baking sheet lined with parchment or a silicone mat.

Toss ½ cup of the chopped peanuts, the sugar, espresso powder, cinnamon, nutmeg and chocolate chops together in a small bowl. Set aside.

Put the Oreo crumbs, melted butter and salt in another small bowl and stir with a fork just until crumbs are moistened. Press the crumbs evenly over the bottom and up the sides of the spring form pan (they should go up about 2 inches on the sides). Freeze the crust for 10 minutes.

Bake the crust for 10 minutes, then transfer it to a rack and let it cool completely before filling.

Working with a stand mixer fitted with the whisk attachment or with a hand mixer in a large bowl, whip 2 cups of the cream until it holds medium peaks. Beat in ¼ cup of the confectioners’ sugar and whip until the cream holds medium-firm peaks. Crape the cream into a bowl and refrigerate until needed.

Wipe out (do not wash) the bowl, fit the stand mixer with the paddle attachment if you have one, or continue with the hand mixer, and beat the cream cheese with the remaining 1 cup confectioners’ sugar on medium speed until the cream cheese is satiny smooth. Beat in the peanut butter, ¼ cup of the chopped peanuts and the milk.

Using a large rubber spatula, gently stir in about one quarter of the whipped cream, just to lighten the mousse. Still working with the spatula, stir in the crunchy peanut mixture, then gingerly fold in the remaining whipped cream.

Scrape the mouse into the crust, mounding and smoothing the top. Refrigerate for at least 4 hours, or overnight; cover with plastic wrap as soon as the mousse firms.

To Finish The Torte: put the chopped chocolate in a heatproof bowl and set the bowl over a saucepan of simmering water. Leave the bowl over the water just until the chocolate softens and starts to melt, about 3 minutes; remove the bowl from the saucepan.

Bring the remaining ½ cup cream to a full boil. Pour the cream over the chocolate and , working with a a rubber spatula, very gently stir together until the ganache is completely blended and glossy.

Pour the ganache over the torte, smoothing it with a metal icing spatula. Scatter the remaining ½ cup peanuts over the top and chill to set the topping, about 20 minutes.

When the ganache is firm, remove the sides of the Springform pan; it’s easiest to warm the pan with a hairdryer, and then remove the sides, but you can also wrap a kitchen towel damped with hot water around the pan and leave it there for 10 seconds. Refrigerate until ready to serve.

Tuesday, April 29, 2008

TWD: Polenta & Ricotta Fig Cake

This is the cake that almost didn't happen. In fact, if it required multiple bake - cool - bake - roll steps, It probably would NOT have have happened.

Between the nephews birthday this weekend, The cheesecake pops, and life in general, I've been pretty busy this last week. But I picked up the ingredients Saturday with the goal of cooking this on Monday (nothing like the last minute). Then of course, I find out that an acquaintance's mother passed away, and we made plans to go to the wake. My Monday was quickly slipping away.

Coming home from the funeral parlor around 9pm, I pick up the cookbook to read through it, in hopes that its an easy one. It is. And aside from the 45 minutes to bake, it didn't even look too time consuming. Plus, I'd specifically bought figs for this recipe, and it'd be a shame for them to go unused.

Assembly was pretty easy, though in hindsight I should have chopped the figs even smaller. While they were tasty, the big pieces could be a little overwhelming. With 3/4 a cup of honey to measure out, I was glad to put my 'trick' to use, which was to liberally spray the measuring cup with non-stick spray BEFORE measuring the honey. It glides out no problemo.

The cake took closer to 50 minutes to get to the 'golden brown' stage, though I was watching it carefully since my pan was 11 inches instead of the 10 1/2, and I figured it'd have finished quicker.

Whipping up some cream and honey, the husband and I sat down to nibble on some before calling it a night. While the cake is tasty, its not for the cavity prone. All the honey plus the figs made for quite a sweet cake. The recipe says it serves appx 8 pieces, but its so sweet I'd probably limit myself to 1/2 a serving and make it for 16.

In the end, a pretty successful cake. Not quite sure if I'll make it again too soon, but a nice addition to the repertoire.

(PS: in advance of any condolences, it was the mother of my husband's coworker, and a woman I'd never actually met. So well wishes to the deity/ether of your choice are fine, but the loss wasn't particularly tolling to me personally, thank you.)


Fluted Polenta and Ricotta Cake

Adapted from Dorie Greenspan’s Baking: From My Home to Yours

About 16 moist, plump dried Mission or Kadota figs, stemmed
1 cup medium-grain polenta or yellow cornmeal
1/2 cup all-purpose flour
1 teaspoon baking powder
1/4 teaspoon salt
1 cup ricotta
1/3 cup tepid water
3/4 cup sugar
3/4 cup honey
Grated zest of 1 lemon
1 stick (8 tablespoons) unsalted butter, melted and cooled
2 large eggs


Storing: Wrapped in plastic, the cake will keep for about 5 days at room temperature. The cake can be frozen for up to 2 months; defrost in its wrapper.
Center a rack in the oven, and preheat the oven to 325 degrees F. Butter a 10 1/2-inch fluted tart pan with a removable bottom, and put it on a baking sheet lined with parchment or a silicone mat.
If your figs aren’t moist and plump, toss them into a small pan of boiling water, steep for a minute, drain, and pat dry.
Whisk the polenta, flour, baking powder and salt together.
Working with a stand mixer fitted with the whisk attachment, beat the ricotta and water together on low speed until very smooth. With the mixer at medium speed, add the sugar, honey and lemon zest and beat until light. Beat in the melted butter, then add the eggs one at a time, beating until the mixture is smooth. Reduce the mixer speed to low, and add the dry ingredients, mixing only until they are fully incorporated.
Pour about one-third of the batter into the pan, and scatter over the figs. Pour in the rest of the batter, smooth the top with a rubber spatula, and dot the batter evenly with the chilled bits of butter.
Bake for 35 to 45, or until a thin knife inserted into the center of the cake comes out clean. The cake should be honey brown and pulling away just a little from the sides of the pan, and the butter will have left light-colored circles in the top. Transfer the cake to a rack, and remove the sides of the pan after about 5 minutes. Cool to warm, or cool completely.
Serving: Serve the cake warm, or at room temperature, with a little honey-sweetened whipped cream.

Sunday, April 27, 2008

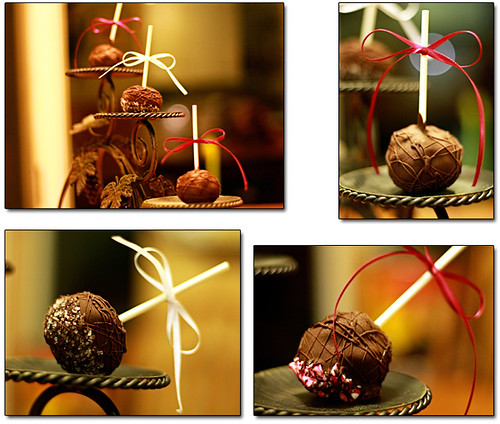
Cheesecake Lollipops: Daring Bakers

Joining the cooking blog community can be intimidating, at times. With so many creative people out there, it makes your lowly baked goods look downright ugly at times, be it for their scads of creativity, or skilled photography. I worked for a few years as a press photographer... so I thought myself decently accomplished at it, but apparently photographing people is a whole different art than food, and I've been working against the learning curve for the last couple months.

In an attempt to push myself both on a cooking front but on an artistic photography one, I signed up for the NY Marathon of food blogging, The daring bakers. I was excited to get my first assignment, Cheesecake lollipops. One of my nephew turns 2 this month, and I knew these would be perfect fare to bring along to the party, lest they sit around our house going straight to my waist.

I knew with all the cooling/freezing times, this would be a several day endeavor. So I set about baking the cheesecake Sunday. I think the grocery store must think me a nutter when I show up to the till with 7 packages of cream cheese... But between this challenge and the carrot cake last week, I put a run on their supplies. Even with them tallying at nearly 2$ a box, I still had an awed gentleman in line behind me ask the cashier if I'd used any coupons since I managed to fill an entire cart for $130. No coupons that trip, but its nice to know that my OCD-like list making and sale spotting pays off.

One of my money savers is my vanilla extract. I haven't had to buy this baking staple in a few years. My office used to have a local vodka company situated on the floor above us. They went out of business a couple years ago, and as a gift of goodwill, they dropped off a case of potato vodka. I excitedly grabbed a bottle and took it home, dropping in a couple vanilla beans. Other than topping it off every couple months with some new vodka, this bottle has been one of my prized ingredients ever since.

After mixing everything up, I set it in the roasting pan/water bath and slipped it in the oven. As the reviews suggested, I left it in nearly 75 minutes before it was browned on top and not 'jiggly' in the middle. I'm glad I'd picked up the 10 inch pan, since in that time, it'd also risen nearly 1/2 an inch above the lip of the pan. As it cooled, it shrank back down, but if it had been a smaller pan, it might have overflowed.

The next day, I set about rolling the balls. I got a digital scale for Christmas, though at times I think I would rather throw it out the window than use it. The maker seems to think it is such a useful tool that I will want to leave it out on my counter 24-7 and use it as a clock, as well as a scale. Because there is no way to turn the darn thing off. All it does, after a period of inactivity, is turn off the scale feature and go to the clock. Which is lovely, considering sometimes I want to chop and measure as I go... but then it looses the tare of the bowl... and I have to start over again.

Anyhow, I managed to get the scale function to work long enough to measure out 2 oz of cheesecake, which was pretty darn big. I decided that these would look super-cute shaped, and figured my ice cream sandwich presses might be the easiest tool to shape them. Sadly, Cheesecake is stickier than I'd figured on. And there was no way to get them shaped without crumbly edges. So I gave up and went for some rustic (theres that word again...) balls, and popped them into the freezer.


The next day, I set about adding the chocolate and toppings. I knew I wanted to use dark chocolate since I'm a big fan... And I decided to use a bit of whatever was in the pantry for toppings. I made some peppermint bark for Christmas gifts this year, and so had a jar of crushed candy cane in there. Making sure to leave out the big pieces, I figured they would look more like crushed peppermints. I also set out some chopped pecans, and red and white sprinkles. I also decided to leave a good lot of them unadorned aside from the chocolate.

I dipped them in sets of around 6, and almost like that magic shell stuff, the frozen cheesecake helped to quickly set the chocolate. My only other problem was that I ended up needing nearly twice the amount of chocolate, so halfway through I had to melt up some more. After coating them all, I had a small amount left, so I put it in a ziplock and played Jackson Pollock drizzling them all with the leftover chocolate.

Overall, this recipe was a success. I'm glad my first DB challenge went with little incident. The husband and I each tried a pop the next day, and aside from falling off the stick after a few bites, they were a big hit. Hopefully they go over as well with the party goers!

To view the other Daring Bakers' pops, visit the Daring Bakers Blogroll. For the Cheesecake Pops recipe, please visit Deborah’s site or Elle’s site.

Cheesecake Lollipops

Tuesday, April 22, 2008

TWD- Billy's Not so Big Carrot Cake

If the lack of updates didn't allude to it, I was on a bit of a break the last 2 weeks. The first weekend was the big local sci-fi convention here, so I was there most of the weekend as well as a friend's Bridal Shower. I was home to sleep all 3 days, and that was about it.

After the convention, I launched right into vacation-prep mode as we then flew down to Florida for 5 days of fun in the sun. We were lent the use of a fabulous house with a pool on the intra coastal waterway, so we did a lot of lounging around, drinking pina coladas, and napping. Not much in the way of cooking, though I did sample some tasty food down there. To say we ate a LOT of food would be an understatement. So, when I looked at this week's TWD challenge of an entire carrot cake, my waistline gave a mild protest. The thought of having an entire 3-layer cake in the house with just the two of us was a bit daunting... even with the healthy allusions of 'carrot cake'. So I sat down with pen and paper and quickly transcribed it into a 1/2 recipe.

The recipe estimated we would need up to 9 carrots grated. Usually when I'm doing a carrot cake, I pull out the Cuisinart. But for 1/2 a cake, I figured I could manage by hand, saving the cleaning time on all those parts. Of course, to grate carrots by hand, I would have to find my grater. When it comes to gadgets and gizmos, my kitchen is pretty well stocked. Fluted pastry rollers, hamburger press, ice cream sandwich maker press, ice cream machine, you name it, its tucked in there somewhere.

The problem, however, is that while everything has very specific homes in my mind, they rarely end up there. We have a cleaning service that comes every other week to tidy up. Before anyone tsks me, honestly, this is one of the best investments I've ever made. I would gladly give up my latte addiction if it meant I wouldn't have to scrub a toilet. So don't knock it unless you try it, and I recommend EVERYONE try it. They are a godsend.

Anyhow, the cleaning people seem to think that every gadget I own belongs in one drawer. So what was originally designated for a small amount of gadgets turns into a black hole. Ah well, there are worse problems to have in life. Hidden under the ricer, helpfully labeled 'turner', and pancake spatula, I found my grater and set to work. I only needed 3 carrots to get the 1 1/2 cups.

From there, the recipe was pretty similar to most carrot cakes I've made, mix the wet, mix the dry, add the dry to the wet... add the nuts/carrots/etc. While I've never made a carrot cake with coconut, I decided to give it a shot since the toasted coconut topping sounded like a nice reminder of our tropical vacation.

After mixing everything up, I decided to make a 'mini' layer cake from 2 heart shaped pans I have. A closer look reminded me they were more triangular than heart shaped, but they were about the size I was looking for. I had some extra batter and divvy'd it up into a cupcake tin.

Apparently I was a little too generous with the divvying, since the cupcakes rose a bit higher than I expected and overflowed into a carrot 'mass'... But I managed to rescue the layer cake without major issue. Since I only had the layer cake, I decided to 1/2 the frosting as well, and made quick work of assembling it.

The odd shaped pans and slightly generous portioning made for a cake not as 'neat' as I'd like, but at that point I figured I'd call it 'rustic' and press on.

I've never tried to 'toast' coconut before, but I figured the name was simple enough, and popped a pan of it into the toaster oven to brown. At first I thought maybe I was missing the concept as nothing appeared to be happening, but soon, color quickly bloomed. I guess I just had a very moist bath of coconut that had to dry out before browning.

In the end, while the pans weren't too large, they were fairly deep. So they made a pretty tall cake that divvied up into ~5 servings. The toasted coconut added a perfectly nutty tropical taste to the moist cake.

This recipe ended up pretty good, though next time I would probably try the full recipe. I might also opt to substitute at least 1/2 the oil with applesauce like I usually do to keep the fat down. Either way, it was a hit!

Bill's Big Carrot Cake (I halved this recipe to make the Billy version)

Baking: From My Home to Yours by Dorie Greenspan

Yields 10 servings


Ingredients:

For the cake:

2 cups all purpose flour

2 teaspoons baking powder

2 teaspoons baking soda

2 teaspoons ground cinnamon

¾ teaspoon salt

3 cups grated carrots (about 9 carrots, you can grate them in food processor fitted w/ a shredding a blade or use a box grater)

1 cup coarsely chopped walnuts or pecans

1 cup shredded coconut (sweetened or unsweetened)

½ cup moist, plump raisins (dark or golden) or dried cranberries

2 cups sugar

1 cup canola oil

4 large eggs


For the frosting:

8 ounces cream cheese, room temperature

1 stick ( 8 tablespoons) unsalted butter, at room temperature

1 pound or 3 and ¾ cups confectioners' sugar, sifted

1 tablespoon fresh lemon juice or ½ teaspoon pure lemon extract

½ cup shredded coconut (optional)

Finely chopped toasted nuts and/or toasted shredded coconut (optional)


Getting ready:

Position the racks to divide the oven into thirds and preheat the oven to 325 degrees Fahrenheit. Butter three 9-x-2-inch round cake pans, flour the insides, and tap out the excess. Put the two pans on one baking sheet and one on another.


To make the cake:

Whisk the flour, baking powder, baking soda, cinnamon and salt. In another bowl, stir together the carrots, chopped nuts, coconut, and raisins.

Working with a stand mixer, preferably fitted with a paddle attachment, or with a hand mixer in a large bowl, beat the sugar and oil together on a medium speed until smooth. Add the eggs one by one and continue to beat until the batter is even smoother. Reduce the speed to low and add the flour mixture, mixing only until the dry ingredients disappear. Gently mix the chunky ingredients. Divide the batter among the baking pans.

Bake for 40-50 minutes, rotating the pans from top to bottom and front to back at the midway point, until a thin knife inserted into the centers comes out clean. The cakes will have just started to come away from the sides of the pans. Transfer the cakes to cooling racks and cool for about 5 minutes, then run a knife around the sides of the cakes and unmold them. Invert and cool to room temperature right side up.

The cakes can be wrapped airtight and kept at room temperature overnight or frozen for up to 2 months.


To make the frosting:

Working with a stand mixer, preferably fitted with a paddle attachment or with a hand mixer in a large bowl, beat the cream cheese and butter together until smooth and creamy. Gradually add the sugar and continue to beat until the frosting is velvety smooth. Beat in the lemon juice or extract.

If you'd like coconut in the filling, scoop about half of the frosting and stir the coconut into this position.


To assemble the cake:

Put one layer top side up on a cardboard cake round or a cake plate protected by strips of wax or parchment paper. If you added the coconut to the frosting, use half of the coconut frosting to generously cover the first layer (or generously cover with plain frosting). Use an offset spatula or a spoon to smooth the frosting all the way to the edges of the layer. Top with the second layer, this time placing the cake stop side down, and frost with the remainder of the coconut frosting or plain frosting. Top with the last layer, right side up, and frost the top- and the sides- of the cake. Finish the top with swirls of frosting. If you want to top the cake with toasted nuts or coconut, sprinkle them on now while the frosting is soft.

Refrigerate the cake for 30 minutes, just to set the frosting before serving.


Serving:

This cake can be served as soon as the frosting is set. It can also wait, at room temperature and covered with a cake keeper overnight. The cake is best served in thick slices at room temperature and while it's good plain, it's even better with vanilla ice cream or some lemon curd.


Storing:

The cake will keep at room temperature for 2 to 3 days. It can also be frozen. Freeze it uncovered, then when it's firm, wrap airtight and freeze for up to 2 months. Defrost, still wrapped, overnight in the refrigerator.


Tuesday, April 1, 2008

TWD: Gooey Chocolate Cake

Monday nights in our house are usually devoted to catching up on whats on the DVR... This week, it involved some good old fashioned middle ages 'relations' as The Tudors returned to Showtime. I'm a new fan of the series, but used the reruns to get up to date, and so far find it enjoyable, especially in comparison to the "Other Boleyn Girl" and "The Boleyn Inheritance" books I recently read, as well as of course the Natalie Portman/Scar Jo movie.


Anyhow, I figured nothing would go better with some medieval 'relations' than some decadent chocolate cake... and this week's challenge fit the bill.

After the multi-step recipes of past weeks, I was almost relieved at the simplicity of this week's recipe. So easy, in fact, that I came home from work, cleaned the leftover dishes from the weekend, put together that night's dinner (Broiled portobello mushrooms with a spinach salad), and then set about getting the ingredients ready for the chocolate cake. I knew with the chopping and melting of chocolate, I didn't want to put the cake into the oven until after dinner, so I simply sliced, diced, and measured out each component before sitting down to eat.

After dinner, I quickly melted up the chocolate and butter, and went to work mixing everything together. I was a little puzzled as to why Dorie recommends disposable muffin cups, but after the sticking issue with the mini brownies I made, I made sure to thoroughly grease and flour my muffin tin before divvying out the batter. The 6 servings seemed ideal for us being a family of 2... too many baked goods lead to waistlines that closer resemble that of the REAL Henry VIII in his later years than the lithe hunk that is Jonathan Rhys Meyers.

Setting the cakes in the oven and dutifully setting the timer, I always fret about baking things that have no way of telling that they are "done" such as a a toothpick coming out clean. But I followed the instructions to a T, letting them bake and rest. Then came the task of removing them from the pan. The finely chopped chocolate had melted making a chocolaty top to each one, which made me wonder about the wiseness of 'turning them out' onto their tops. But the Gooey center worried me if they were to puncture if I tried to lift them out of the pan. In the end I turned them out onto the parchment paper, deciding a little lost chocolate off the top was better than lost chocolate from the middle.

I served up two cakes with some Breyers coffee ice cream, and we set down to enjoy them and start up the DVR. I think there were more moans of ecstasy from us than the TV as we devoured them.


While the middle was soft and moist, It isn't as 'gooey' as past chocolate cakes I've had. This recipe is sinfully delicious and easy, next time I might only cook them for 10-11 minutes rather than the 13 to get more of a gooey center.


Gooey Chocolate Cake
1/3 cup all-purpose flour
3 tablespoons unsweetened cocoa powder
¼ teaspoon salt
5 ounces bittersweet chocolate,
4 ounces coarsely chopped,
1 ounce very finely chopped
1 stick (8 tablespoons) unsalted butter, cut into 8 pieces
2 large eggs, at room temperature
1 large egg yolk, at room temperature
6 tablespoons of sugar

Getting ready: Center a rack in the oven and preheat the oven to 400 degrees F. butter (or spray – it’s easier) 6 cups of a regular-size muffin pan, preferably a disposable aluminum foil pan, dust the insides with flour and tap out the excess. Put the muffin pan on a baking sheet.
Sift the flour, cocoa and salt together.
Set a heatproof bowl over a saucepan of gently simmering water, put the coarsely chopped chocolate and the butter in the bowl and stir occasionally over the simmering water just until they are melted – you don’t want them to get so hot that the butter separates. Remove the bowl from the pan of water.
In a large bowl, whisk the eggs and yolk until homogeneous. Add the sugar and whisk until well blended, about 2 minutes. Add the dry ingredients and, still using the whisk, stir (don’t beat) them into the eggs. Little by little, and using a light hand, stir in the melted chocolate and butter. Divide the batter evenly among the muffin cups and sprinkle the finely chopped chocolate over the batter.
Bake the cakes for 13 minutes. Transfer them, still on the baking sheet, to a rack to cool for 3 minutes. (There is no way to test that these cakes are properly baked, because the inside remains liquid.)
Line a cutting board with a silicone baking mat or parchment or wax paper, and, after the 3-minute rest, unmold the cakes onto the board. Use a wide metal spatula to lift the cakes onto dessert plates.